Our shiny new G1 arrived yesterday - now down to me to make something work on it! Lots of other folks have reviewed the device from a user perspective, generally coming to the conclusion that it is a great OS somewhat let down by the HTC hardware. Won't disagree with that view, but my focus here is going to be on app development for the beast.
Guess I am showing my age and deteriorating eyesight but I hate devices whose manuals only come on CD - always prefer paper given the choice. Once the manual painstakingly copied onto my PC desktop turned out to be the usual sort of standard - i.e. doesn't tell you much past the basics.
First challenge is simply to get the pathway worked out such that an app I create in eclipse over onto the G1 and fire it up.
Setting up the development environment under winxp is very smooth:
- Download the current (v1.0 r2) Android SDK and unpack in some sensible folder.
- Add https://dl-ssl.google.com/android/eclipse/ to your list of eclipse plugin download sites and install everything you find there.
- Restart eclipse and in the new Android properties section stick in the path to the SDK directory.
- Extend your system path variable to include the SDK's tools directory.
To connect the shiny new phone to the PC so the debugger can see it you need to:
- On the phone go into settings-->applications-->development and switch on USB debugging.
- Connect the phone and when it screams about the missing driver point it towards the usb_driver subdir in the SDK folder.
- (Re)start eclipse and the phone should appear in the DDMS perspective.
> adb install HelloAndroid.apk
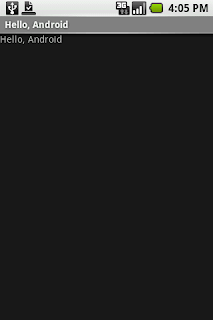
And there we are:
 This was captured with the very developer friendly screenshot capture utility which is provided as part of the DDMS perspective for any attached device.
The app will now have appeared in the DDMS perspective allowing heap and thread viewing etc, and you can then simply fire up the debug perspective and set breakpoints etc - all very smooth - works well.
UPDATE: Of course you can skip the adb bit and transfer and run the app in a single step from and Android style eclipse run/debug launch configuration!
PS. Credits - much of this process was picked up from here and here.
PPS. The latest carnival is up over at Mobscure - and my previous post on the Scottish Software Awards gets a mention.


No comments:
Post a Comment